Layer Management
Commercial layer management is very important to achieve the potential and profitable egg production.
Different stages of commercial layer
• Chick (0 to 8th week)
• Grower (9th to 18th week)
• Layer (19th to 72nd week)
Layer phase 1 (19th to 42nd week)
Layer phase 2 (43rd to 72th week)
Pre arrival precaution:
Before introduction of new batch, down period of 15 days should be given between two batches. The houses should be properly washed and disinfected with suitable disinfectant.
Eg: Fumigation (40 ml 10% formalin + 20 g KMnO4 – 1×), QAC compounds, Flame gun.
Management of Chick (0-8 Weeks):
a. Preparation of the house:
- Initially the house should be completely depopulated. An approved insecticide like Malathion or Sevin to be used in accordance with the manufacturer’s direction and sprayed inside and at least 3 meters (10 ft) outside the house. This should be done within 24 hours after the bird’s removal and prior to the removal of litters and equipments.
- After about 48 hours, all the equipments and litter should be taken out. Litter should be removed in closed bags and should be taken away from farm premises. The entire house should be cleaned thoroughly. The cleaning process includes scrubbing with brushes until the surface are visibly clean and flushing with clean water. Entire floor and the lower parts of the walls should be soaked and brushed with a detergent powder and scrubbed with hot water. While cleaning, due care should be taken in cracks and crevices of the house.
- When the building is completely dried, the entire inside portion of the shed should be washed down with an effective disinfectant applied with high pressure sprayer. A solution containing 3-5 % cresol or 2-3% caustic soda or lime water can be used as a disinfectant. Disinfection of a shed implies the elimination from the house of all micro-organisms that are capable of causing disease.
- All equipments like feeders, waterers etc should be soaked thoroughly, scrubbed free of all adhering matters with a stiff brush, rinsed and sprayed with disinfecting solution. After cleaning, the equipments should be sun dried for a whole day.
- A fresh coat of white wash to the entire inside walls is also considered essential.
- New litter should be sprayed over the house and all the cleaned equipments should be returned to the house.
- A foot-bath containing a strong disinfectant should be provided at the entrance of the building.
- The house thus prepared should be kept locked till 2 days prior to arrival of chicks. No other person except the workers of the shed should be allowed to enter the house.
b. Preparation for brooding:
- The floor of the house should be completely covered with new litter material to a depth of approximately 5 cm (2 inch).
- Arrangement for brooding should be done in the middle of the pen area leaving the end of the house unused. The area should be first covered with clean dried gunny bags over which newspapers are to be sprayed. This is done to prevent the chicks from eating the litter material.
- The brooder is placed on the spread newspaper. Generally 6 numbers of 40 watt bulbs are used in the hover.
- The corners of the brooding room or pen should be rounded off with card board. This is done to prevent the birds from pilling up in the corners after the removal of the chick guard.
- To maintain the room temperature of the building, the nets of the sidewalls should be covered with curtains made of gunny bags or Hessian cloth hanged from outside. During the coolest part of the year, a plastic curtain may also be used from inside the house in addition to the curtains used from outside of the building. Curtains should be fixed in such a way that it can be rolled back whenever felt necessary.
- At least 12 hours before the arrival of chicks all the switches of the brooder and the house should be put on to maintain the required temperature of 950F(35oC). This can be measured by putting a thermometer at the edge of the brooder 5 cm (2 inches) above the floor.
- A few hours before the chicks arrival, the waterers should be filled so that it will be of room temperature when the chicks arrive. The water should be boiled and cooled and mixed with glucose and vitamin. It is essential to provide 3 chick waterers for each 100 chicks for first 2 weeks.
c. Providing first feed to chicks:
Feeds should be provided at least 2 hours after the chicks are placed in the brooder. The feed should be sprinkled over the entire area covered by newspaper and encircled by the chick guard. After a few hours, feed should be given in flat type feeder lids or clean egg trays.
d. Feeding of chicks:
- The chicks are provided with a type of feed called chick feed from day-old age to the end of 8th week of age. It contains about 22 percent crude protein and about 2700 kilocalorie metabolizable energy.
- During the first few weeks, it is advisable to put feed in the feeders at least 4 times a day. Feeders should be cleaned from litter materials before filling it and while placing new feed in the feeders, it should be mixed up thoroughly with the left over feed. At the start, the feeders must be kept full so as to encourage the chicks to eat. Subsequently, the level of feed in the feeder must not be more than half full.
- During this 8 week period each chick should be provided with 5 cm (2 inch) feeder space and 2.5 cm (1 inch) water space.
- Placement of feeders at proper height is essential for the chicks to eat properly.
- Feeders should be distributed uniformly so that whatever the position of the bird in the house it is not far away from the source of feed. This is especially important during the early days of chick’s life.
- During the brooding period feeders should not be arranged directly under the heat source. After the removal of the brooder the feeders should be arranged parallel to the rays of natural light falling in the house to avoid producing shadows.
- Before putting new feed in a feeder, one end of the feeder should be lifted, preferably the end far away from light so that all the left over feeds goes to the end near the light.
- Inadequate number of feeders in a chick house may cause crowding and spillage of feed. It is also essential to maintain the feeder height, throughout the raising period.
Care and management of newly arrived chicks
- Plan the requirements of chicks, book with hatchery people and contact and confirm the exact date and time of arrival of chicks. When chicks are delivered, do not allow the delivery van into the farm premises. Take delivery at the entrance itself.
- Keep clean drinking water ready. Add 8gm of glucose, 0.5-1gm of mild antibiotic or antibacterial drug per liter, electrolytes and vitamin mixture at recommended dosage in water for the first day.
- Antibiotics and vitamins may be continued for 3-5 days.
- Keep medicated water before leaving the chicks into the brooder arrangement.
- Keep feeders open for five hours and spread a little feed on the newspaper. Check whether the chicks are healthy, of uniform weight within the suggested range of 40-48 gm each.
- Count the chicks, dip the beak of the chicks in the drinking water and place it gently into the brooding arrangement.
- Return weak, inactive, unhealthy chicks with matted feather at the back and the dead chicks and ask for replacement. Check that the chicks’ move actively scratching and taking feed and water.
- If kerosene stoves or coal stoves are used, a metal vessel with sand is placed over the stove to dissipate heat properly.
- Heater coils may also be provided for warmth instead of bulbs. They have to be hanged above the reach of the chicks.
- It is necessary to verify whether the warmth given is sufficient to the chicks. During 1st week, chicks require 350C (950F) warmth, which may be reduced by 50C every week.
- A thermometer kept at the bird level will indicate the temperature.
- More practical way of assessing the adequacy of warmth provided is by watching the distribution of chicks within the brooder guard management. If they are crowded under or near the source of heat, then the warmth given is not sufficient. Then a bulb may be added to the hover or the height of the hover may be brought down.
- If chicks have moved to the periphery and are reluctant to come to the centre under heat source, then temperature in the environment is higher than required. The hover may be pushed up or a bulb removed.
- If the chicks feel comfortable at the given temperature, they walk actively throughout the area unmindful of the heat provided and some taking rest setting their head down on the side, the posture being given the name as chick comfort.
- Particularly, the hover may be put on for 22 hours in a day switching it off for only 30 minutes during the night. Later on, lighting for heat may be given during night only up to the end of 2nd or 3rd week, depending on the season. It may be restricted to one-week only during peak summer and extended to three weeks during winter or rainy seasons. In such seasons, it is advisable to close sides of the house with thick curtains during first week.
e. Watering of chicks:
The following are some important points, which farmers should remember while watering chicks.
- Mortality of chicks can be reduced by using boiled and cooled water throughout their brooding period or at least up to first 4 weeks of their life.
- At no stage waterers should be allowed to become dry. Lack of water in a shed for a few hours can slow down the growth rate of the chicks.
- Availability of drinking surface is more important than amount of water in waterers. Hence, several small waterers are better than a few large ones.
- Waterers should be changed to bigger ones as the birds grow.
- Waterers should be placed in such a way that at no stage birds have to walk more than 3 meters (10 ft) to a waterer.
- The maximum distance between two waterers should be 2,5 meter (8 ft).
- Placing waterer at the same site cause wet spots around the waterers and may result in disease outbreak. Hence, waterers should be placed daily at different sites.
- Fresh water should be used always. Left over in waterers should be discarded.
- All the waterers must be washed nicely with a detergent powder daily in the morning before filling it. Waterers should be refilled in the afternoon.
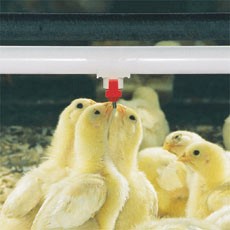
Watering to chicks
f. Debeaking
- The trimming of the upper beak of a chicken is known as debeaking which is done to control cannibalism in a flock.
- It is done by cutting and cauterizing the upper beak of the bird at the point half way between the tip of the beak and the nasal opening.
- To debeak a bird electrically operated equipment named debeaker is used.
- First debeaking is done at 7 to 10 days of age.
- This is to be repeated at the age between 12 to 14 weeks of age again.

